Thursday, 28 February 2019

How to draw Apple with pencil - realistic drawing

How to draw Apple ,how to draw Apple with pencil, Apple realistic drawing ,pencil drawings, drawing for beginners, step by step tutorial ,Apple graphite pencil drawing ,Apple drawing for beginners ,easy drawing of Apple, drawing for kids

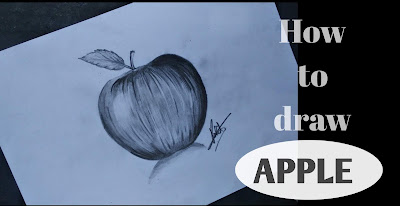
Hey guy's, welcome to our new drawing tutorial blog. This tutorial is one of the most important drawing tutorial blog because today we were going to draw APPLE realistic drawing with the help of graphite pencils. From this drawing we will get to known more drawing techniques that I am used for to draw realistic drawing. So first let's know the drawing tools we need

                 Drawing tools we need

1.Graphite pencils - 2b,4b,6b,8b or 10b
2.Charcol pencils
3.Pencil eraser
4.Paperstumps
5.Mechanical pencil

                      Important points

These are some important points that we must take care when we were going to draw realistic drawing of apple with graphite pencils:
•Use lighter grade graphite pencils with 2b pencil or mechanical pencil for to draw outline.
•Use Paperstumps for to give smooth texture on Apple darwing on smooth shading.
•Use pencil eraser for to add more details on Apple drawing  according to need.
So after knowing all this important points let's start the apple drawing tutorial blog.

How to draw Apple ,how to draw Apple with pencil, Apple realistic drawing ,pencil drawings, drawing for beginners, step by step tutorial ,Apple graphite pencil drawing ,Apple drawing for beginners ,easy drawing of Apple, drawing for kids

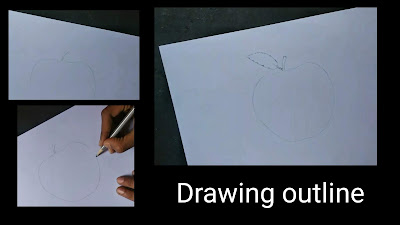
1.First step: In the first step friend's we will draw outline of apple. For to draw outline we will draw with mechanical pencil or Hb graphite pencils. You can draw outline according to the reference image or with your imagination.

How to draw Apple ,how to draw Apple with pencil, Apple realistic drawing ,pencil drawings, drawing for beginners, step by step tutorial ,Apple graphite pencil drawing ,Apple drawing for beginners ,easy drawing of Apple, drawing for kids

2.Second step: Our second step friend's is one of the most important step friend's. In this step friend's we draw first with 2b pencils at upper corner parts and also shade with 6b pencil at some part according to the reference image. We use 8b graphite pencils or charcoal pencils at one side for dark shades for adding depth.
At last we will shade with 4b pencils at whole part and left some part at centre according to the reference image.

How to draw Apple ,how to draw Apple with pencil, Apple realistic drawing ,pencil drawings, drawing for beginners, step by step tutorial ,Apple graphite pencil drawing ,Apple drawing for beginners ,easy drawing of Apple, drawing for kids

3.Third step: In this step friend's we will shade with 6b pencil at lower part according to the reference image. Also we use paperstumps for to add smooth texture on Apple drawing. We will use paperstumps at shading area where we will use 4b pencils.

How to draw Apple ,how to draw Apple with pencil, Apple realistic drawing ,pencil drawings, drawing for beginners, step by step tutorial ,Apple graphite pencil drawing ,Apple drawing for beginners ,easy drawing of Apple, drawing for kids

4.Fourth step: In this step friend's we will draw line pattern according to refrence image. As you can how I draw lines according to image of apple. For to draw lines use 8b dark grade pencils. We need to draw from upper and also some from lower areas. Then we will eraser and erase some parts at one side where there is lighter shades so it's will help us to give shinning effect. Also in this step friend's we will shade leaves of apple according to reference image by using 4b & 6b pencils.

How to draw Apple ,how to draw Apple with pencil, Apple realistic drawing ,pencil drawings, drawing for beginners, step by step tutorial ,Apple graphite pencil drawing ,Apple drawing for beginners ,easy drawing of Apple, drawing for kids

5. Fifth step: At last step friend's we add some details by using pencil eraser. You can see how I am using eraser for to giving pattern of lines according to apple image. It will helps us alot for to give realistic look. Then we draw shadow texture by using paperstumps according to the reference image .


So I hope friends you will understand it apple realistic drawing tutorial ,don't forget to follow us also watch our latest blogs. Also watch youtube videos for more information. 

Thanks for visiting us, follow us now


Wednesday, 20 February 2019

Landscape Drawing with pencil - step by step tutorial - for begginers

Landscape drawing for begginers with pencil by Art of Rohit

How to draw landscape drawing, landscape drawing with pencil, easy drawing tutorial for landscape drawing, landscape drawing, best landscape drawing with pencil, pencil drawing, how to draw landscape

Hello guy's once again welcome to our new drawing tutorial blog. Today we will learn to draw landscape with pencil on white paper with the help of Graphite pencils. This Landscape drawing is the best drawing for begginers to learn with easy steps. We will able to draw it by following only five simple steps.
So friend's let's know the drawing tools first that we need for to draw.

Drawing tools we need

1.Graphite pencils-2b,4b,6b & 8b
2.Paperstumps
3.Kneaded eraser
4.White drawing paper

                          Important points

These are some important points that we must take care when we are going to draw landscape drawing on paper:
1.Draw always outline of house, trees and other things of landscape on paper with the help of lighter grade graphite pencils or with mechanical pencil for lighter outline.
2.Add different-different layers of shading to the landscape surface or on house for realistic look. 
3.Use Paperstumps or tissue papers for to give smooth texture on our landscape drawing.
4.In landscape drawing you need to take a refrence image of landscape otherwise you can draw it with your observations.
So after knowing all this important points let's start our step by step tutorial for to draw landscape Drawing on paper.

How to draw landscape drawing, landscape drawing with pencil, easy drawing tutorial for landscape drawing, landscape drawing, best landscape drawing with pencil, pencil drawing, how to draw landscape


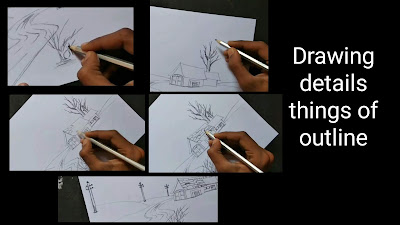
1.First step: In first step friend's we will draw outline of house shape. For to draw outline I am using 2b pencils for lighter shades. Here I am drawn outline of wooden house according to the refrence image or you can draw with the help of perspectives. Also drawing road path and hills according to the reference image.

How to draw landscape drawing, landscape drawing with pencil, easy drawing tutorial for landscape drawing, landscape drawing, best landscape drawing with pencil, pencil drawing, how to draw landscape

2.Second step: In this step friend's we draw the outline of plants and trees. We draw plants at path corner and trees behind the house because it's will give awesome landscape look.
Then we will do shading for the houses so first I do shading on roof of house with the help of 6b pencil at corner of rectangular blocks. Also do Shading of walls of house.

How to draw landscape drawing, landscape drawing with pencil, easy drawing tutorial for landscape drawing, landscape drawing, best landscape drawing with pencil, pencil drawing, how to draw landscape

3.Third step: In this third step friend's we will do shading of hills area. So first we add layer with 8b pencils at corner and then we add layer  with 4b pencils. For to draw texture of road path on roads we will make straight lines with 6b pencils according to the reference image.

How to draw landscape drawing, landscape drawing with pencil, easy drawing tutorial for landscape drawing, landscape drawing, best landscape drawing with pencil, pencil drawing, how to draw landscape

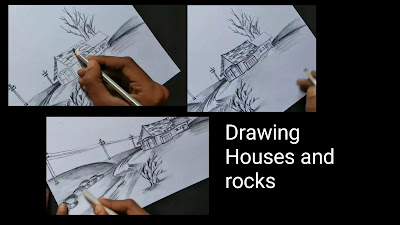
4.Fourth step: In this step we will draw stone and house. For to draw rocks first we will draw outline of rocks then we will add layer of darker shades at the corner parts. After shading houses we will do blending at rock part for smooth texture.

How to draw landscape drawing, landscape drawing with pencil, easy drawing tutorial for landscape drawing, landscape drawing, best landscape drawing with pencil, pencil drawing, how to draw landscape

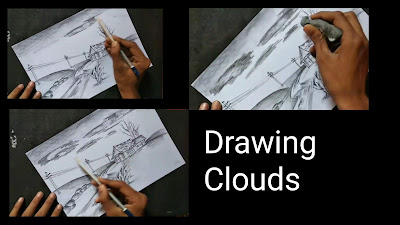
5Fifth step: In this last step friend's we do blending for the landscape darwing for smooth texture. For blending we use paperstumps. At last we will draw clouds. For to draw clouds we will shade with 4b pencils and do shading with 2b pencils make circular shape. We will do blending on clouds it will give realistic look.


So I hope friend's you will like or enjoy it. Don't forget to follow us also watch our video for more information and also visit our lastest drawing tutorial blog.

     Thanks for visiting us,follow us now

Thursday, 14 February 2019

How to draw 3D square box on paper - step by step tutorial with pencil

Drawing 3D Square box with pencil by Art of Rohit

3D square drawing, how to draw 3D square on paper, how to draw a square with pencil, how to draw a square, how to draw 3D square  on paper, pencil drawing ,3D pencil drawing ,easy drawing for kids

Hello friend's once again welcome to our new drawing tutorial blog. Today we will learn to draw 3D square shape on paper with the help of Graphite pencils. This 3d drawing is one of the easiest 3d drawing for begginers. We will able to draw it by following just simple steps.
So friend's let's know the drawing tools first that we need for to draw.

Drawing tools we need

1.Graphite pencils-2b,4b,6b & 8b
2.Paperstumps
3.Paper cutter
4.White drawing paper

                          Important points

These are some important points that we must take care when we are going to draw 3D square drawing on paper:
1.Draw always outline of square on paper with the lighter grade graphite pencils or mechanical pencil for lighter outline.
2.Cut paper from the middle of square with the help of paper cutter with lefting the lower side paper with drawing. 
3.Use Paperstumps or tissue papers for to give smooth texture on our drawing.
So after knowing all this important points let's start our step by step tutorial for to draw 3D Square box on paper.

How to draw square shape, 3d drawing of square, square darwing with pencil, 3D darwing tutorial of square on paper, easy pencils drawing, 3d illusion drawing

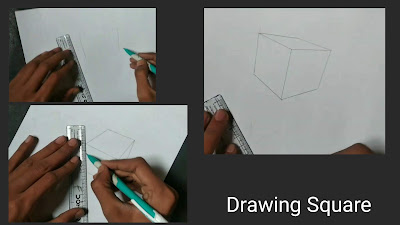
1.First step: In first step friend's we will draw outline of square shape. For to draw outline I am using 2b pencils for lighter shades. Here I am drawn outline with the help of two point perspectives. You need to take point two point one at left side or one at right side. Then take two lines from both point and matched it according to image. You will observe that you will getted square shape.

How to draw 3D square on paper, 3D drawing on paper ,pencil drawing step by step tutorial, how to draw 3D drawing ,how to draw 3D square step by step tutorial, pencil drawing ,drawing for beginners, drawing for kids, sketch artist, sketching tutorial

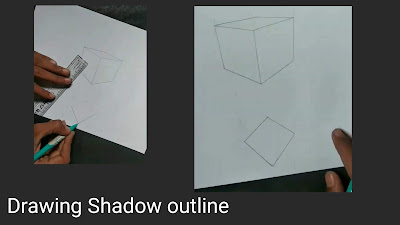
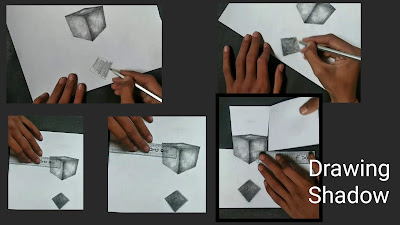
2.Second step: In this second step friend's we will draw outline of shadow. For to draw shadow friend's you need to take one point at lower side. Draw straight lines towards upper side and match one line at middle where two lines meets or two at both side according to image. At last draw line from two point perspectives at shadow area and erase extra lines. Now our shadow outline is complete.

How to draw pencil,how to draw square on paper, step by step to draw square on paper,easy drawing for kids,step by step tutorial for to draw square, pencils drawing

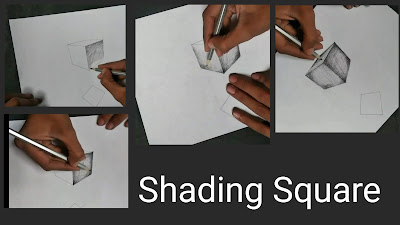
3.Third step: In this step friend's we will do shading for our square shape. First I am shading with 2b pencils at square part and then applying second layer at corners with 6b pencils. Also using 8b pencils at upper part.

How to draw square, step by step tutorial for to draw square, square drawing on paper with pencil, easy drawing of square for square, best drawing tutorial

4.Fourth step: In this step friend's we will do blending part. As you can see here I am using paperstumps in first part of image for smooth texture. Use kneaded eraser at centre part for to add more details and shading with 8b pencils at corner parts.

How to draw square, square pencil drawing with pencils, step by step tutorial for to draw square

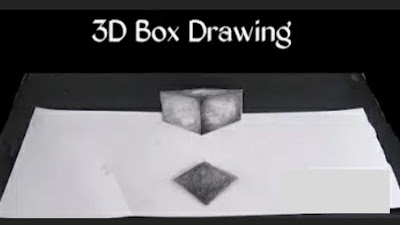
5.Fifth step: In this last step friend's we will draw shadow and cutting paper from middle part. For to do shading for shadow use 6b pencils and cut the white paper from middle by lefting lower white paper with drawing. Now we will able to see it in 3d and just started looking like floating square at some angles.

So I hope friend's like or enjoy it. Don't forget to follow us also watch our video for more information and also visit our lastest drawing tutorial blog.

     Thanks for visiting us,follow us now


Wednesday, 6 February 2019

How to draw Trees - step by step tutorial - for begginers

Drawing Tree - step by step tutorial by Art of Rohit


How to draw trees, step by step tutorial,with the pencil ,how to draw trees with graphite pencil, step by step for to draw tree ,tree pencil drawing, pencil drawing of tree,how to draw trees with pencil, drawing for beginners, sketching guide sketching tutorials, how to draw tree for kids,best drawing tutorial for to draw tree,

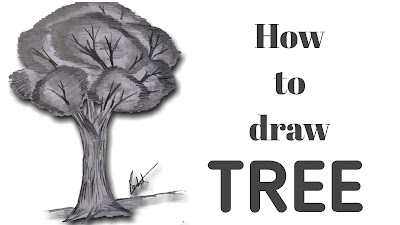
Hello Friend's, once again welcome to our another new drawing tutorial blog. Today we draw tree by using graphite pencils on white drawing paper. This tutorial is so helpful for begginers to understand different shades of shadings. We draw it in just 10-15 mins according to your experience. First let's know the drawing tools we need for to draw. So let's start.

Drawing tools we need

1.Graphite pencils 2b,4b and 8b
2.Charcol pencils
3.Paperstumps
4.Drawing white paper

                            Important points

These are some important points which we must take care when we were going to draw Trees:
•Drawing outline of trunks and stems first by using light grade pencils so it's can erase easily.
•Use paperstump for to give smooth texture on crown parts of tree and draw wooden texture on trunks or stems part of tree.
•You can draw outline of trees by using grid method or by freehand as per your needs.
So after knowing all these important points let's know the step by step tutorial tutorial for to draw Trees.

How to draw tree how to draw a stem for tree ,step by step tutorial for to draw Trees, how to draw Trees, drawing for begginers, basic drawing tutorial

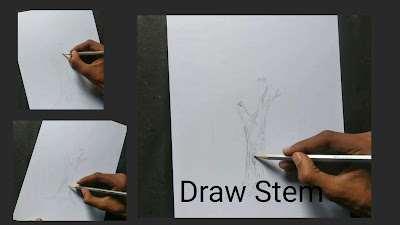
First step: In the first step Friend's we will draw stems and trunks of tree. For to draw stems and trunks use light grade pencils like 2b or hb graphite pencils. Also draw wooden textures on stems. Draw small straight lines on stems according to image for give wooden texture's.

How to draw Trees, step by step tutorial, best drawing of tree, easy drawing of tree, easy tree drawing, best Trees graphite drawing , crown part of tree, drawing for begginers

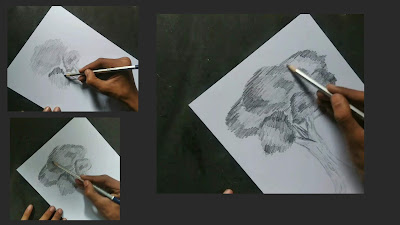
Second step: In second step friend's we will do shading for the crown part of tree. For shading use 4b or 6b pencils. As you can see first i shade with 4b pencil and give shape of oval shape. You follow this steps for to draw trunks part of tree.

How to draw Trees, step by step tutorial, best drawing of tree, easy drawing of tree, easy tree drawing, best Trees graphite

Third step: In this step friend's we will complete shading for the crown part of tree. Here I am shading with 6b graphite pencils at the corner of parts of crown areas. You can see in image how I do shading and follow this step to add different shades.

How to draw Trees, step by step tutorial for to draw Trees, easy tutorial for to draw tree, how to shading with graphite pencils, trees drawing, tree drawing

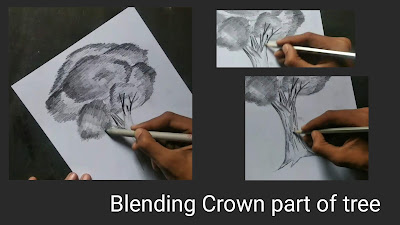
Fourth step: In this step we will blend the crown part of tree. So for blending I am using paperstumps. By using paperstumps we get smooth texture on our crown part of tree. We also draw with 8b pencil on stem parts to give wooden texture.

How to draw tree step by step tutorial ,for to draw tree ,pencil drawing drawing for beginners, easy drawing tutorial for to tree, easy tutorial for to draw tree, drawing basic sketching , beginners tutorials

Fifth step: In last step friend's we draw branches for the tree. So for to draw branches I am using charcol or 8b pencils. We draw it on crown part of tree according to the image. You need to draw some small wooden stem at some parts where we need to add branches.

So I hope friend's you will like it don't forget to follow us also watch our youtube videos for more information.


Also visit latest tutorials

Thank you for visiting us


Featured posts

Essential Drawing Tools and Materials for begginers - Top 10 list

    Basic drawing tools and accessories for begginers - by Art of Rohit  Hello friend's, today I will tell you and discuss about b...

Popular posts