Drawing 3D Square box with pencil by Art of Rohit
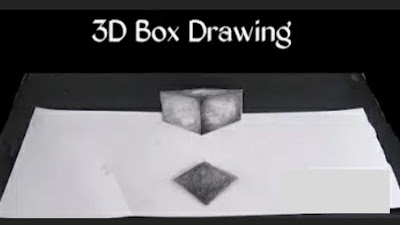
Hello friend's once again welcome to our new drawing tutorial blog. Today we will learn to draw 3D square shape on paper with the help of Graphite pencils. This 3d drawing is one of the easiest 3d drawing for begginers. We will able to draw it by following just simple steps.
So friend's let's know the drawing tools first that we need for to draw.
Drawing tools we need
1.Graphite pencils-2b,4b,6b & 8b
2.Paperstumps
3.Paper cutter
4.White drawing paper
2.Paperstumps
3.Paper cutter
4.White drawing paper
Important points
These are some important points that we must take care when we are going to draw 3D square drawing on paper:
1.Draw always outline of square on paper with the lighter grade graphite pencils or mechanical pencil for lighter outline.
2.Cut paper from the middle of square with the help of paper cutter with lefting the lower side paper with drawing.
3.Use Paperstumps or tissue papers for to give smooth texture on our drawing.
So after knowing all this important points let's start our step by step tutorial for to draw 3D Square box on paper.
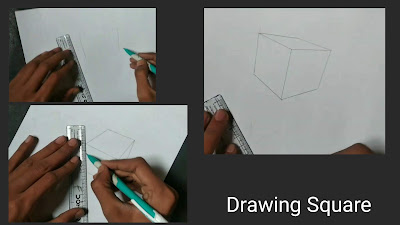
1.First step: In first step friend's we will draw outline of square shape. For to draw outline I am using 2b pencils for lighter shades. Here I am drawn outline with the help of two point perspectives. You need to take point two point one at left side or one at right side. Then take two lines from both point and matched it according to image. You will observe that you will getted square shape.
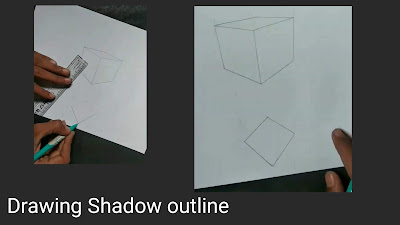
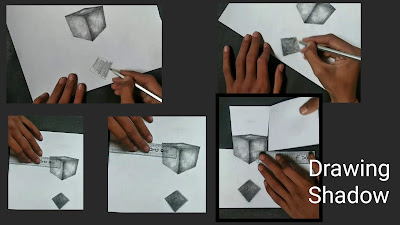
2.Second step: In this second step friend's we will draw outline of shadow. For to draw shadow friend's you need to take one point at lower side. Draw straight lines towards upper side and match one line at middle where two lines meets or two at both side according to image. At last draw line from two point perspectives at shadow area and erase extra lines. Now our shadow outline is complete.
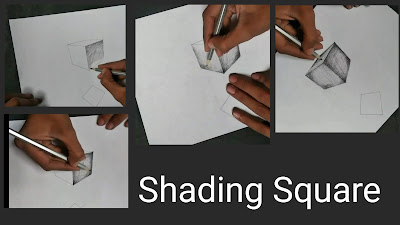
3.Third step: In this step friend's we will do shading for our square shape. First I am shading with 2b pencils at square part and then applying second layer at corners with 6b pencils. Also using 8b pencils at upper part.
4.Fourth step: In this step friend's we will do blending part. As you can see here I am using paperstumps in first part of image for smooth texture. Use kneaded eraser at centre part for to add more details and shading with 8b pencils at corner parts.
5.Fifth step: In this last step friend's we will draw shadow and cutting paper from middle part. For to do shading for shadow use 6b pencils and cut the white paper from middle by lefting lower white paper with drawing. Now we will able to see it in 3d and just started looking like floating square at some angles.




No comments:
Post a Comment