Showing posts with label 3D Drawing tutorials. Show all posts

Tuesday, 11 June 2019

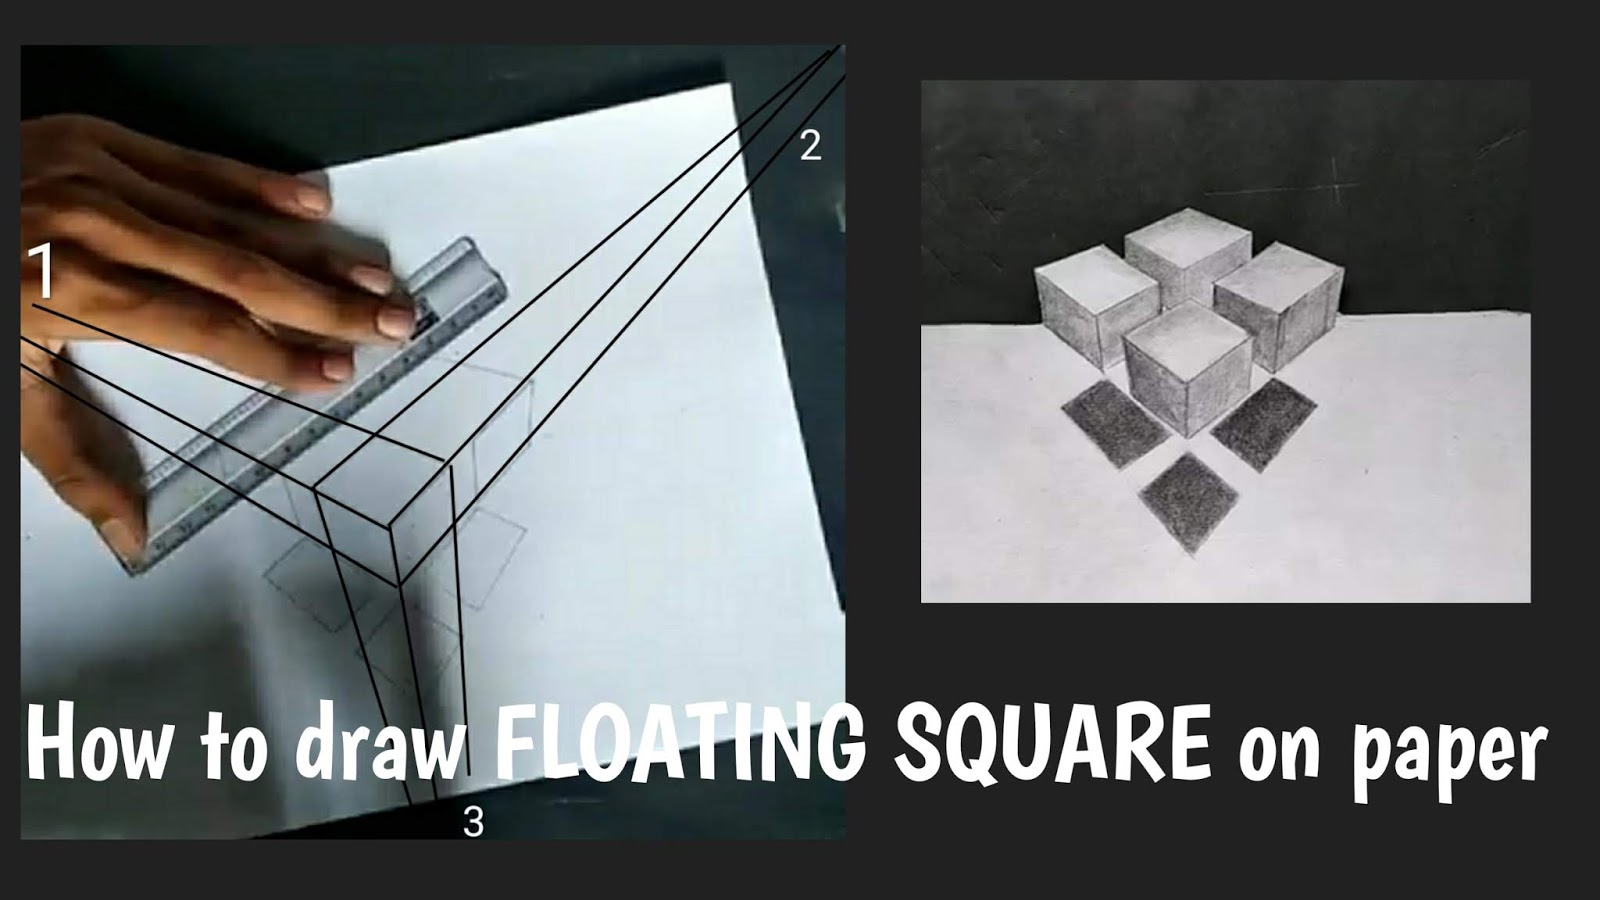
How to 3d floating squares shape boxes on paper - 3d drawing art

How to draw 3d Floating square on paper,  3d square drawing , 3d square drawing illusion, 3d drawing art, best 3d drawing, 3d sketch, 3d art on paper

Hey friend's, welcome back to our another drawing tutorial blog. Today we will learn to draw about on very interesting topic which is floating square boxes drawing on paper. This drawing tutorial is tough for those one's whose concept is not clear about prespectives drawing. So I suggest first please learn about prespectives drawing. Basically we made 3d square with the help of three point prespectives. Let's known the drawing tools first that we need to draw.

                 Drawing tools we need

1.Graphite pencils
2.Paperstumps
3.Scale
4.White drawing paper
5.Papercutter

                     Important points

These are some important points which we must take care when we were going to draw multiple square box on paper:
•Use scale for to draw lines from one point to to the another point.
•Use different grade of pencils for to add different texture on walls.
•Use paperstumps for to add smooth texture to the shadow so it's look realistic.
After knowing all this important points let's start to our step by step tutorial for to draw floating multiple square.

How to draw 3d Floating square on paper,  3d square drawing , 3d square drawing illusion, 3d drawing art, best 3d drawing, 3d sketch, 3d art on paper

1. First step: In the first step friend's we will take three point one at left, right or down. Draw two lines from one side first then draw two lines again from another side. It will give us square shape in 3d. After doing this step we draw lines from below the square from the point's. Then we take one point at downwards and draw lines towards to three sides of square. Now 3d shape started visible.

How to draw 3d Floating square on paper,  3d square drawing , 3d square drawing illusion, 3d drawing art, best 3d drawing, 3d sketch, 3d art on paper

2. Second step: In second step friend's we will draw small four square in the big square shape. So by following the same steps we draw square by making small gaps. Also draw square below the 3d shape for to make shadow texture.Then we erase the lines which is not the part of small square.

How to draw 3d Floating square on paper,  3d square drawing , 3d square drawing illusion, 3d drawing art, best 3d drawing, 3d sketch, 3d art on paper

3. Third step: In third step friend's our main work is to do shading of square. Here we use different grade pencils for to add different shades. So we use 4b pencils on one side and 6 on side side. At last we use paperstumps for to add smooth texture to shadow. 

How to draw 3d Floating square on paper,  3d square drawing , 3d square drawing illusion, 3d drawing art, best 3d drawing, 3d sketch, 3d art on paper

4. Fourth step: At last step friend's we will cut paper from the middle of square shapes. So draw straight lines in middle and cut with paper cutter by removing the upper parts of square. Now our drawing started to look in 3d.


So I hope friend's you will enjoyed and learn to draw to floating squares on paper. For more interesting drawing tutorial step by step follow us, and share our work with your friend's 


Thank you for visiting us

Monday, 29 April 2019

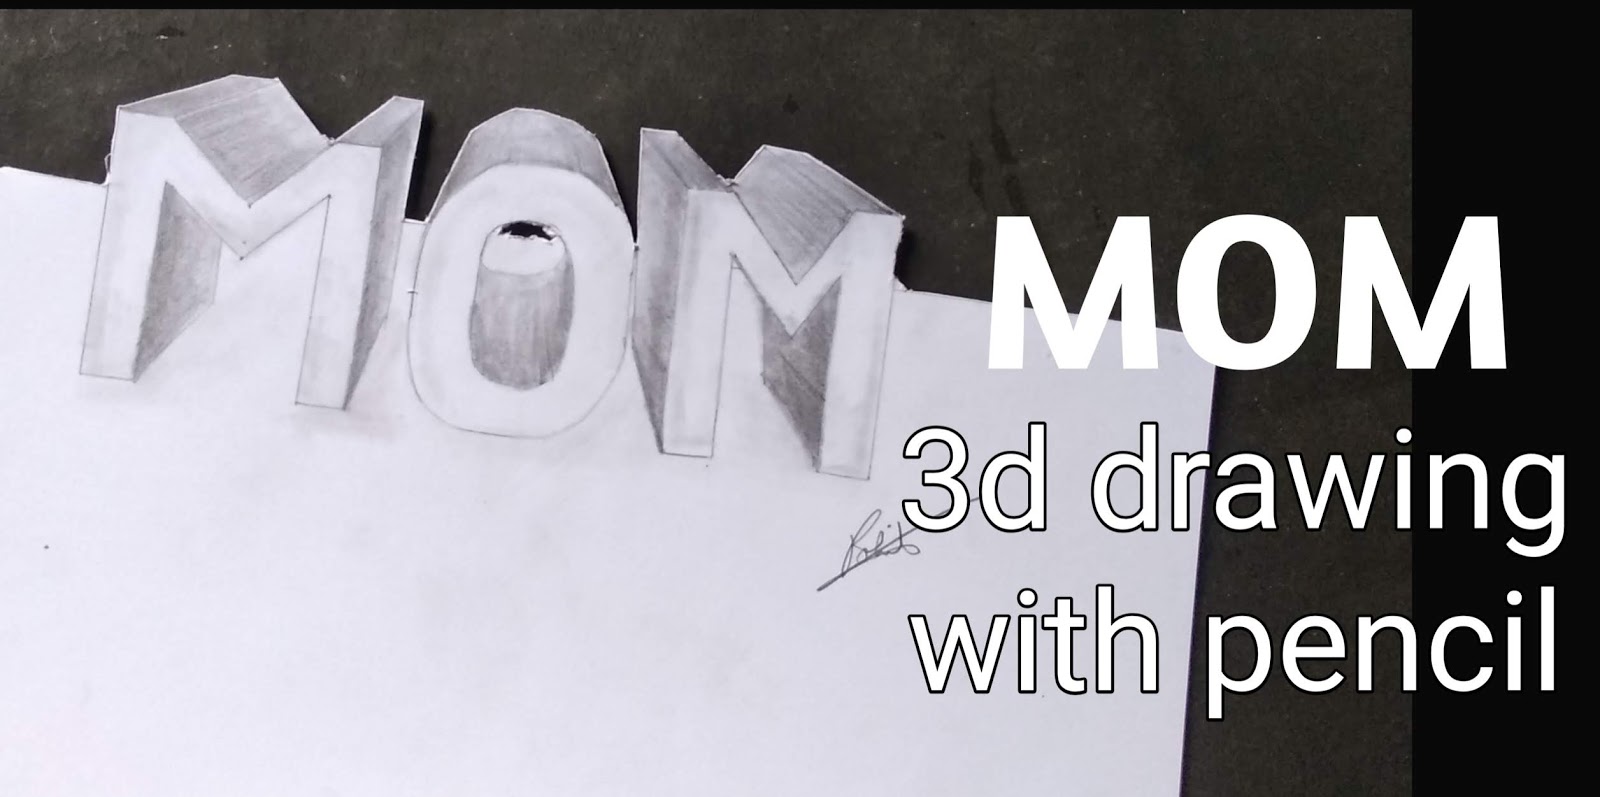
How to draw MOM in 3D - Mother's day drawing

Mother's day drawing, step by step tutorial, mom drawing with pencils, happy mother's day, Mother's day pencils drawing

Hello friend's once again welcome to our another interesting 3d drawing tutorial. As we know Mother's day is coming soon so I decided to day draw 'MOM' word in 3d on paper with the help of graphite pencils. You can use this technique for to write in mother's day greeting cards. So without wasting time let's start our step by step tutorial for to draw 'MOM' in 3d and first let's know  drawing tool's and material's we need.

                  Drawing tools we need

1.Graphite pencils - 2b,4b,6b & 8b
2.Paperstumps
3.Kneaded eraser
4.Scale
5.White drawing paper

                       Important points

These are some important points which we must take care when we were going to draw 'MOM' word in 3d:
•For to draw lines use scale and light grade pencils so you can erase your mistakes easily.
•Use one point perspective method for to draw word in 3d
•At last cut paper from middle and remove upper white paper by lefting drawing with lowder side paper.
So after knowing all this important points let's start our step by step tutorial.

Drawing 3d outline of mom word,Mother's day drawing, step by step tutorial, mom drawing with pencils, happy mother's day, Mother's day pencils drawing

1.First step: In first step friend's we will draw outline of 'MOM' word with the help of mechanical pencil or hb pencils.  Here I have drawn rectangular box then divide into three equal square parts. Two square box for M word and one for O and draw by following the above image.

Mom drawing with one point perspective,Mother's day drawing, step by step tutorial, mom drawing with pencils, happy mother's day, Mother's day pencils drawing

2. Second step: In second step friend's we will draw line from the corner point of word to the one point. You need to take one point at above of Mom word  but lines should be not more than 2cm. Also draw line above 'MOM' word and never draw line above this line. By following this trick you will get 3d outline of 'MOM' word. 

Shading mom word, Mother's day drawing, step by step tutorial, mom drawing with pencils, happy mother's day, Mother's day pencils drawing

3. Third step: In this step friend's we will do shading of 'MOM' word. For shading use 4b and 6b pencils. Shade with 6b pencil at the between lines drawn with one point prespectives  and blend it with help of paperstumps for smooth texture.

Mother's day drawing, step by step tutorial, mom drawing with pencils, happy mother's day, Mother's day pencils drawing

4. Fourth step: At last we will cut paper with scissors. Draw line in middle of 'MOM' word then cut with the scissors by lefting drawing with the lower part. Also don't forget to draw shadow texture for 'MOM' word with the help of paperstumps.


So I hope friend's you will enjoy it and don't forget to follow us. Watch our Youtube videos for more information.


Thank you for visiting us, follow us now


Thursday, 18 April 2019

How to draw LOVE in 3D letter - step by step tutorial

How to draw love in 3d , 3d love drawing , love 3d drawing, step by step tutorial, 3d drawing for begginers, kids drawing

Hey guy's welcome back to our another drawing tutorial blog. Today we will learn to draw love in 3d with the help of two point perspective. So if your concept is not clear about two perspective drawing please watch our this 3d square drawing tutorial. Through this tutorial you get to know about two point perspective better. So before we start step by step tutorial let's know the drawing tools we need.

              Drawing tools and materials

1.Graphite pencils - 2b,4b,6b and 8b 
2.Paperstumps
3.Eraser
4.Scale
5.White drawing paper

                         Important points

These are some important which we must take care when we were going to draw letters of love in 3d:
●Draw outlines and lines with help of light grade pencil like hb or mechanical pencils.
●Use the method of two perspective for to letters in 3d .
●Don't forget to draw shadow texture for letters.
So after knowing all this important point's let's start our step by step tutorial.

L 3d drawing, how to write love in 3d, 3d kids drawing, 3d drawing for begginers

1.First step: In the first step friend's we will draw single line horizontally where we take two points at both two ending part of line. When we take two points then we need to draw two lines from the two points towards another lines. Then draw straight vertical lines for to draw L structure.  In above image you can see how I draw and follow the process.

Drawing ,3D drawing with two point perspective, love 3D drawing, drawing for beginners ,step by step tutorial ,beginners drawing ,how to write love in 3D

2.Second step: In second step friend's we will draw another letter 'O'  again with that process but here we change direction. So for to change the change the side of perspectives. You can see in 'L' view is different from '0' because of changing points.  Here I am changing two point perspective but you can draw both words without changing points. By following this step you can draw rest words 'v'  an ' e ' .

How to draw love in 3D ,3D drawing step by step tutorial ,beginners drawing, easy 3d drawing, how to draw 3d love with pencil, 3d drawing with pencil

3.Third step: In this step friend's we will do shading part. For shading I am using 4b and 6b pencils.  You need to shade with 6b at from one point and use 4b for shading second points. At corner points use 6b also according to the above image.

Love 3d drawing with pencil, step by step tutorial, kids drawing, begginers drawing, how to draw love in 3d, love drawing with pencil

4.Fourth step: At last step friend's we draw shadow texture. For to draw shadow we need to do shading with 2b pencils vertically downwards. Then blend it with the help of paperstumps. Do shading with paperstumps at letters also so it will give us realistic look


So  I hope friend's you will understand stand it for more information watch our Youtube videos . This drawing will help you to clear you concept of two point perspectives drawing.

How to draw- Diamond, Flowers , 3d room , rose

          Thanks for visiting us,follow us now

Thursday, 4 April 2019

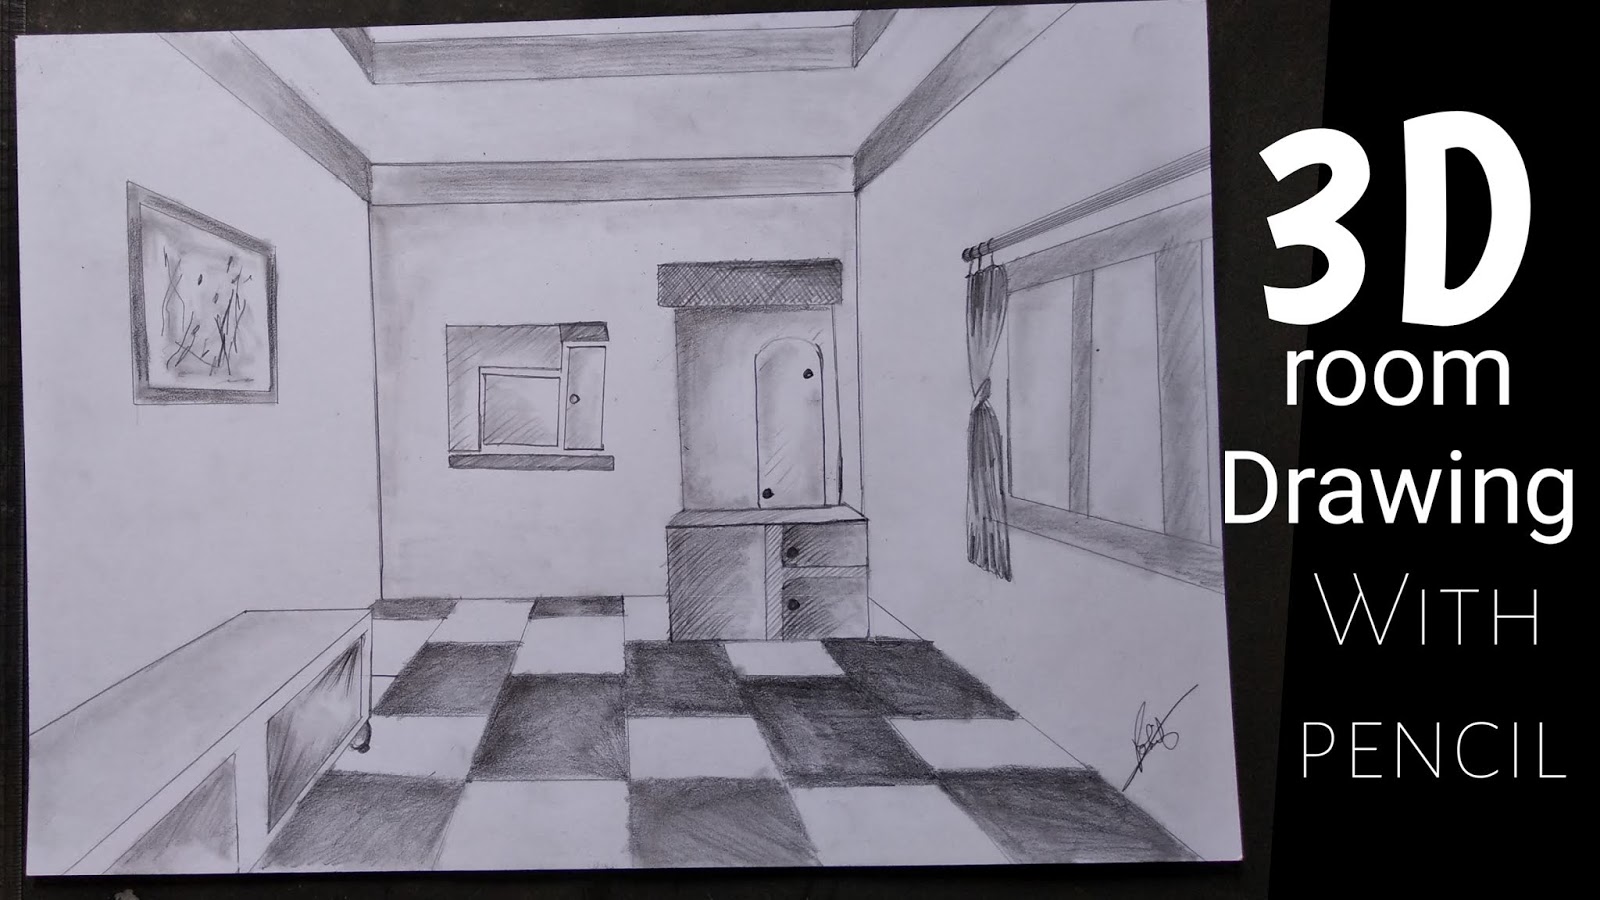
How to draw 3d room with one point perspectives


Room 3d drawing, room drawing with one point perspectives, 3d room drawing, drawing for begginers, room drawing step by step tutorial, room designs

Hey Guy's welcome back to our another drawing tutorial blog. Today we will learn to draw room in 3d with one point perspectives. This topic is one of the most interesting and important friend's. When we able to draw 3d room our concept about one point perspectives will be cleared. So before we start step by step tutorial let's know the drawing tools first that we need to draw 3d room.

                  Drawing tools we need

1.Graphite pencils - 2b,4b & 6b
2.Kneaded eraser
3.Scale
4.White drawing paper

                       Important points

These are some important points that we must take care when we were going to draw 3d room drawing:
•We must need to draw room with the help of one point perspectives so we will able to make acqurate drawing of room.
•Always use light grade pencils for to draw outlines of rooms wall and things  so you can erase mistakes easily.
•Use scale for to draw lines in room drawing so we will get accurate lines of rooms walls.
So after knowing all this important points let's start our step by step tutorial.

Room drawing with one point perspectives,3d room drawing, step by step tutorial, easy drawing, room design.room drawing for begginers, kids Drawing

 1.First step: In first step friend's we will draw square or rectangular shape. Here I have taken height of 10cm and 12cm length. After that we take one point in recantangle and this will become our one point perspectives. The way of taking point is we need to draw lines from one corner side of square to another side again we draw lines one side to another where the both lines meet that will be our point. So by this way we get one point perspectives for room drawing.

drawing rooms tiles, room drawing with pencil, step by step tutorial, one point perspectives drawing, begginers drawing, house drawing,kids drawing

2.Second step: In second step friend's we will draw tiles structure for room. We need to point on bottom recantangluar lines by making gap of 2cm. Then we need to draw through this point towards the ground. You should always keep in mind that you need to match with one point perspectives to another point then draw lines towards the ground from point. So by this way you will be draw correct tiles structure.

Room drawing with pencil, step by step tutorial, easy room drawing, drawing windows for home , kids drawing,

3.Third step: In third step friend's we will draw ceiling for the room. For to draw we need to draw line from certain point at ceiling towards. Here also we need to match one point perspectives with ceiling point. Take ceiling point according to size of ceiling. Also we will follow the same step for to draw window.

Room drawing with one point perspectives, step by step tutorial, room drawing with pencil, easy house drawing, begginers tutorial

4.Fourth step: In this step we will draw some goods for houses. Here I have drawn almira for room. For almira I have take another one point perspectives by following the same step. Then with the help of one point perspectives I have drawn it. Also I have drawn boxes for home by following the room one point perspectives.

Room drawing with one point perspectives, step by step tutorial,kids drawing, room drawing with perspectives, room pencils deawing

5.Fifth step: At last step we will one of most important work which is shading. So for shading tiles I have used 4b pencils and also shade almira some parts with it. Then with the help of 2b pencils shade ceiling straight walls and blend it. Use paperstumps for to give shiny effects on mirrors.


So I hope friend's you will understand and enjoy it. Watch YouTube videos for more information. Also share it with your friends
Visit our latest blogs:Rose, 3d drawing, Banana, scenery Drawing.

Thanks for visiting us, follow us now


Thursday, 14 February 2019

How to draw 3D square box on paper - step by step tutorial with pencil

Drawing 3D Square box with pencil by Art of Rohit

3D square drawing, how to draw 3D square on paper, how to draw a square with pencil, how to draw a square, how to draw 3D square  on paper, pencil drawing ,3D pencil drawing ,easy drawing for kids

Hello friend's once again welcome to our new drawing tutorial blog. Today we will learn to draw 3D square shape on paper with the help of Graphite pencils. This 3d drawing is one of the easiest 3d drawing for begginers. We will able to draw it by following just simple steps.
So friend's let's know the drawing tools first that we need for to draw.

Drawing tools we need

1.Graphite pencils-2b,4b,6b & 8b
2.Paperstumps
3.Paper cutter
4.White drawing paper

                          Important points

These are some important points that we must take care when we are going to draw 3D square drawing on paper:
1.Draw always outline of square on paper with the lighter grade graphite pencils or mechanical pencil for lighter outline.
2.Cut paper from the middle of square with the help of paper cutter with lefting the lower side paper with drawing. 
3.Use Paperstumps or tissue papers for to give smooth texture on our drawing.
So after knowing all this important points let's start our step by step tutorial for to draw 3D Square box on paper.

How to draw square shape, 3d drawing of square, square darwing with pencil, 3D darwing tutorial of square on paper, easy pencils drawing, 3d illusion drawing

1.First step: In first step friend's we will draw outline of square shape. For to draw outline I am using 2b pencils for lighter shades. Here I am drawn outline with the help of two point perspectives. You need to take point two point one at left side or one at right side. Then take two lines from both point and matched it according to image. You will observe that you will getted square shape.

How to draw 3D square on paper, 3D drawing on paper ,pencil drawing step by step tutorial, how to draw 3D drawing ,how to draw 3D square step by step tutorial, pencil drawing ,drawing for beginners, drawing for kids, sketch artist, sketching tutorial

2.Second step: In this second step friend's we will draw outline of shadow. For to draw shadow friend's you need to take one point at lower side. Draw straight lines towards upper side and match one line at middle where two lines meets or two at both side according to image. At last draw line from two point perspectives at shadow area and erase extra lines. Now our shadow outline is complete.

How to draw pencil,how to draw square on paper, step by step to draw square on paper,easy drawing for kids,step by step tutorial for to draw square, pencils drawing

3.Third step: In this step friend's we will do shading for our square shape. First I am shading with 2b pencils at square part and then applying second layer at corners with 6b pencils. Also using 8b pencils at upper part.

How to draw square, step by step tutorial for to draw square, square drawing on paper with pencil, easy drawing of square for square, best drawing tutorial

4.Fourth step: In this step friend's we will do blending part. As you can see here I am using paperstumps in first part of image for smooth texture. Use kneaded eraser at centre part for to add more details and shading with 8b pencils at corner parts.

How to draw square, square pencil drawing with pencils, step by step tutorial for to draw square

5.Fifth step: In this last step friend's we will draw shadow and cutting paper from middle part. For to do shading for shadow use 6b pencils and cut the white paper from middle by lefting lower white paper with drawing. Now we will able to see it in 3d and just started looking like floating square at some angles.

So I hope friend's like or enjoy it. Don't forget to follow us also watch our video for more information and also visit our lastest drawing tutorial blog.

     Thanks for visiting us,follow us now


Wednesday, 16 January 2019

How to draw 3D Block letters with graphite pencils - step by step tutorial

Drawing '3D' word in 3d block letters - step by step by Art of Rohit


How to draw 3D block letter, step-by-step to draw easy drawing for 3D pencil drawing,3D pencil drawing with the help of Graphite pencils,how to draw 3D, 3D block letters drawing, step by step tutorial for to draw block letters, 3D block letters drawing for kids, drawing for beginners, online drawing, online drawing tutorial

Hey guy's, once again welcome to our new interesting 3D drawing tutorial blog. In this tutorial we will learn to draw words in 3D BLOCK letters. Here I decided to take word 3D for to draw in block letters. So let's start but first we need to know the drawing tools that we need for to draw.

Drawing tools we need

1.Graphite pencils - 4b & 6b
2.Mechanical pencils
3.Paperstumps
4.Scale
5.Papercutter

                        Important points

These are some important points that we must remember when we are going to draw 3D block letters.

•Always try to draw with the help of two point perspectives or one point perspectives because from this method we get right 3D drawing with right angle.
•Shading will be done according to the block letters angle and size.
•Always try to draw shadow texture for block letters and cut the paper into half parts by lefting drawing remove upper part.
After knowing all this important points let's start our step by step tutorial for to 3D block letters.

How to draw block letters ,step by step tutorial for to draw 3D block letters, pencils drawing, 3D drawing of pencils, easy drawing for kids, graphite pencil drawing of block letters, 3D drawing kids drawing, drawing for beginners

1.First step: In first step friend's we will draw the outline of 3D with the help of mechanical pencil. Use 0.5mm grade pencils for lighter outline. For to draw proper outline use grid method otherwise draw with freehand.

how to draw 3D block letters,step by step by step tutorial,easy drawing for kids, 3D drawing for kid 3D block letters, step by step tutorial graphite pencil, drawing of 3D drawing ,online drawing videos, online drawing courses ,online drawings

2.Second step: In this step we will draw line from one to each corner point of 3D outline. Here for to draw lines using one point perspectives with the help of scale and use mechanical pencil for to draw scale. Now you can see in above image that our '3D' word started to look in 3D block letters.

Drawing for kids, step by step tutorial how to draw 3D block letters graphite drawing 3D letters, online drawing blog, step by step tutorial for beginners

3.Third step: In this step we will complete the outline of 3D word. One thing you must take care that you need to draw a line of fixed centimetres. As you can see here I take 3cm for to draw line and each lines must be of same size. Again match outline on backward part for to complete for 3D look.

How to draw 3D block letters, step by step tutorial how to draw 3D block letters, easy drawing for kids, tutorials for drawing for beginners, 3D block letters

4.Fourth step: Now friend's we will do shading for our 3D word drawing. For Shading first I shade internal layer of 3D word using 6b graphite pencils and for shading upper layer using 2b pencils for lighter shades. Dark the some corner areas according to the above image.

How to draw 3D block letters, step by step tutorial, drawing for kids, how to draw 3D block letters, step by step tutorial, drawing for beginners, graphite pencils drawing of blocks letters, how to draw 3D drawing with pencil

5.Fifth step: In this last step friend's we will blend the shading areas with the help of paperstumps. After blending we will draw straight in middle of 3d drawing and cut it with the help of paper cutter. Remove upper part by lefting drawing with the lower paper part.

I hope friend's you will enjoy it and understand my process for to draw 3D block letters on paper with graphite pencils. So more information you can watch our YouTube videos and watch our new interesting tutorial.


Thank you for visiting us, follow us now


Monday, 31 December 2018

How to draw '2019' in 3D on paper with pencils - step by step tutorial

'2019' 3D Drawing - step by step tutorial by Art of Rohit


2019 3d drawing, happy new year 2019, 3d drawing of 2019, how to draw 2019 on paper , learn to draw 2019, step by step tutorial for to draw 2019

Hello friend's, once again welcome to our new drawing tutorial blog. First of all friend's I wish you a very happy new year so I decided to make drawing tutorial on drawing of  2019 number in 3D from graphite pencils on paper. Before we start step by step tutorial let's know the drawing tools we need for to draw.

                   Drawing tools we need

1.Graphite pencils - 2b,4b,6b & 8b
2.Paperstumps
3.Scale
4.Paper cutter 
5.white paper

                        Important points

These are some important points we must remember when we are going to draw 2019 numbers in 3D from graphite pencils.

• Use darker grade pencils for in some parts of drawing according to the reference image.
•Draw outline with the help of grid method for proper outline of 2019 otherwise you can draw with freehand also.
•Cut paper into half parts by lefting drawing from lower part of white paper.

After knowing all this important points let's start our step by step tutorial for to draw 3D drawing of 2019.

2019 3d drawing, happy new year 2019, 3d drawing of 2019, how to draw 2019 on paper , learn to draw 2019, step by step tutorial for to draw 2019

1.First step: In the first friends we will draw outline of 2019. For to draw outline use grid method for proper outline and use 0.5mm pencils for lighter outline.

2019 3d drawing, happy new year 2019, 3d drawing of 2019, how to draw 2019 on paper , learn to draw 2019, step by step tutorial for to draw 2019

2.Second step: In this step friend's we will draw straight towards below the paper according to the angle of 3D image. Every line must be having Same length here I am taken 4cm for to draw straight line.

2019 3d drawing, happy new year 2019, 3d drawing of 2019, how to draw 2019 on paper , learn to draw 2019, step by step tutorial for to draw 2019

3.Third step: In this step friend's we will shade 2019 according to reference image. First shade the outer walls with the help of 4b pencils and then shade the corner of walls with the help of 6b pencils. It's helps a lot to give 3d look in our drawing.

2019 3d drawing, happy new year 2019, 3d drawing of 2019, how to draw 2019 on paper , learn to draw 2019, step by step tutorial for to draw 2019

4. Fourth step: At last step friend's we will cut paper into half parts for 3D look. We should take care that we need to remove upper part of white paper without cutting drawing. After this our drawing started to look in 3D

I hope friend's you will understand to draw 2019 in 3D from graphite pencils on paper. Also visit 3d tutorials blog. For more information you can watch our YouTube videos.


Thank you for visiting, us follow us now


Sunday, 30 December 2018

'G' 3D Drawing on paper with graphite pencils - step by step tutorial by Art of Rohit

'G' Floating word 3D Drawing -step by step tutorial by Art of Rohit
How to draw 3D drawing of G, G 3D drawing, 3D letters drawing ,how to draw 3D letters, drawing for kids, drawing for beginners, sketching tutorials, online tutorials,

Hello friend's, once again welcome to our new 3d drawing tutorial blog. Today we will learn to draw 'G' floating word in 3D in just four steps. Before we start step by step tutorial  let's know the drawing tools we need for to draw 3d drawing of 'G'.

                   Drawing tools we need

1.Graphite pencils - 2b,4b & 10b
2.Scale
3.Paperstumps 
4.White paper

                         Important points

These are some important points we must remember when we are going to draw 3D drawing of 'G' or any letters:

•Always try to draw shadow texture for your 3d letters drawing because it's play major role for to give 3d look and make view like that object having some distance from surface.
•Blend the 3D drawing with the help of paperstumps for smooth texture.
•Draw outline with the help of grid method or if you able too draw it with freehand you can.

After knowing all this important points let's start step by step tutorial for to draw 'G' 3D drawing.

'G' 3d drawing, step by step tutorial, how to draw 3d letters drawing drawing, how to draw outline, step by step instructions, 'G' outline

1.First step: In first step friend's we will draw outline of 'G' word first with freehand or you can use grid method for proper outline as per your need. Here I am using 0.5mm pencil for to draw outline.

How to draw G, step by step tutorial of 'G', easy Drawing tutorial, begginers drawing of G, easy drawing guides, how to draw'G', step by step guide

2.Second step: In this step friend's we will draw straight line towards below and it will be at least 2-4cm. Line should be drawn from the ending outline part of 'G'. For to draw you can use 0.5mm pencils for light outline.

How to draw shadow texture for letters, easy tutorial for to draw 3d , step by step instructions of G, easy tutorial of G, 3d shadow of drawing, step by step guide of shadow texture, guide for shadow texture drawing, easy drawing tutorial,

3.Third step:In this step guys we will draw shadow texture for drawing. Once again we will draw straight line towards below and match all the line of lower part. So it's form the shape of 'G' and erase the straight lines. Then we shade the lower 'G' word with the help of 10b pencils or you can use charcoal pencils also.

How to draw 'g' 3d Drawing, step by step tutorial of 'G' drawing, learn to'G' , drawing for begginers, sketching tips, how to shade G

4.Fourth step: At last step friend's we will shade the outer or inner surface of 'G' word. 
For shading you can use 4b or 6b pencils.
First we shade the surface with 4b surface and then use 6b pencils according to image. After shading we will blend it with the help of paper stumps.

I hope friend's you will understand to draw 'G' word in 3d by using graphite pencils. For more information you can watch our YouTube videos.


Thank you for visiting us, follow us now


Friday, 28 December 2018

How to draw Pearl Ring from graphite pencils on paper - step by step tutorial

PEARL Ring 3D Drawing - step by step tutorial by Art of Rohit
Ring drawing, pearl ring drawing, step by step tutorial for to draw ring, how to draw pearl ring, drawing for kids, easy drawing for kids, drawing for begginers, online drawing classes, 3d pearl drawing

Hello friend's, once again welcome to our new drawing tutorial. Today we will learn to draw Pearl Ring in 3D from graphite pencils on paper. So before we start step by step tutorial let's know the drawing tools we need for to draw pearl ring.

Drawing tools we need

1.Graphite pencils - 2b,4b,6b & 8b
2.Paperstumps
3.Scale
4.Paper cutter
5.White paper

                         Important points

These are some important points we must remember when we are going to draw 3d drawing of pearl ring:
•Draw shiny texture on pearl by using eraser & you draw square on pearl shaded area using eraser.
•Use darker grade pencils for adding details in some parts of ring.
•Don't forget to draw shadow texture for ring and also cut white paper into half parts by using scale with lefting ring drawing with lower papersides.
After knowing all this important points let's start our step by step drawing tutorial of pearl ring.

How to draw pearl ring, step by step tutorial how to draw outline of ring,step by step drawing of ring, 3d drawing of ring,easy drawing for kids, drawing for class 8,easy way of drawing ring,beginners guide,online drawing courses

1.First step: In first steps friend we will draw the outline of pearl ring. Here I am using 0.5mm pencils for to draw outline and you can use grid method for to draw proper outline.

How to draw 3d pearl ring drawing, step by step tutorial of pearl ring, easy Drawing of pearl ring , realistic ring drawing,

2.Second step: In this step friend's we will draw the lighter shade of pearl ring. Draw lighter shades by using 2b or 4b graphite pencils and shade according to the ring reference image.

How to shade darker areas, how to draw pearl ring, step by step tutorial for to draw ring, begginers drawing, easy drawing for kids, drawing tutorial

3.Third step: In this step friend's we will shade the darker areas of ring. For drawing darker areas use 6b or 8b pencils. Here I am drawing darker areas according to the reference image of pearl ring.

How to draw pearl ring drawing, step by step tutorial for to draw ring, drawing tips and tricks, easy drawing, drawing for kids

4.Fourth step: In this step friend's we will draw the shadow texture for pearl ring. First I am shaded some areas below the ring by using 2b pencils and then blend it with the help of paper stumps for smooth texture. Also blend some parts of ring according to the reference image for smooth texture.

Cutting paper for 3d drawing of pearl ring, pearl ring drawing step by step tutorial, easy drawing for kids, begginers drawing, online drawing, drawingclasses

5.Fifth step: Now friend's we will cut the white paper into half parts by using the scale. When we are going to cut the paper into half parts  we must take care that we don't need to cut pearl ring. We need to remove upper sider white by lefting ring drawing with lower side paper. So it's will gives us 3d view of pearl ring.

So I hope friend's you will understand to draw pearl ring drawing with the help of graphite pencils. For more information you can watch our YouTube videos & also visit our new drawing tutorial blogs.


Thank you for visiting us, follow us now


Sunday, 23 December 2018

How to draw broken walls in few steps - step by step tutorial

Broken WALL Drawing- step by step tutorial by Art of Rohit

How to draw broken walls, step by step tutorial for to draw broken walls, easy Drawing, easy drawing for kids, drawing for learning

Hello friend's,once again welcome to our new interesting drawing tutorial blog. Today we will learn to draw broken wall on white paper with the help of graphite pencils. Before we start let's know the drawing tools we need for to draw the broken wall.

Drawing tools we need

1.Graphite pencils - 2b,4b,6b & 8b
2.Mechanical pencil
3.paperstumps
4.White paper

                         Important points

These are some important points we must remember when we are going to draw broken walls on white paper:
•First try to draw the broken wall structure and shade it according to the reference broken wall image.
•Draw the crack walls by using the mechanical pencil for to drawing proper crack details on wall.
•Try to use paperstumps for to give smooth texture on broken walls.
After knowing all this important points let's start step by step tutorial for to draw broken wall on white paper.

Drawing broken walls, step by step tutorial for to draw broken walls, easy drawing of broken walls, easy drawing for kids, walls structure draw

1.First step: In this step friend's we will draw the outline of broken walls. Here for to draw the outlines I am using mechanical pencil 0.5mm and shade it with the help of 2b pencils.

Cracked wall drawing, step by step tutorial for to draw walls, how to draw walls, easy to draw walls structure, walls Drawing

2.Second step: In this step friend's we will draw the cracked wall structure with the help of mechanical pencil. Draw with the help of reference image otherwise use lightning structure for proper cracked wall drawing.

Step by step tutorial for to draw broken walls, cracked wall structure drawing, easy drawing for kids, learn to draw

3.Third step: Here we will shade the broken walls by using 4b pencils. First we will draw recantuglar block of different or irregular sizes on paper and shade it pencils. This will help us alot to give relastic drawing of broken walls. Also remember that you must have to left centre point for hole structure

Blending broken walls for smooth texture, how to draw broken walls, step by step tutorial of crack wall drawing, drawing for kids, easy drawing for kids, crack wall

4.Fourth step: At last step friend's we will blend the broken walls for smooth texture. For blending you can use paper stumps or tissue paper. Also add some details by using darker grade pencils like 6b or 8b. By using this four steps friend's you will be easily able to draw it.

I hope friend's you will be able  to understand to draw the broken walls for more information you can watch our YouTube video


Thank you for visiting us, follow now


Featured posts

Essential Drawing Tools and Materials for begginers - Top 10 list

    Basic drawing tools and accessories for begginers - by Art of Rohit  Hello friend's, today I will tell you and discuss about b...

Popular posts